How to disable keyring in Manjaro


install manage keyring
Terminal:
sudo pacman -S seahorse


search the application


change the password keyring (sorry for the picture are ubuntu, but seahorse is same application)


write old password


now type password in blank


accept use unencrypted passwords


That’s it! Restart your computer for the setting to take effect. Next time you launch Chrome or Chromium browser, you should not see keyring request.


Source: https://www.fosslinux.com/2561/how-to-disable-keyring-in-ubuntu-elementary-os-and-linux-mint.htm

0 comentarios :

debug jobs in laravel


it is very easy hehe

change in your .env

this QUEUE_DRIVER=redis

for this QUEUE_DRIVER=sync


0 comentarios :

configure cpupower


Terminal:
sudo pacman -S cpupower

Terminal:
systemctl start cpupower && systemctl enable cpupower

check type driver
Terminal:
cat /sys/devices/system/cpu/cpu*/cpufreq/scaling_driver

if is intel_pstate


you should be this:
Terminal:
nano /etc/default/grub

replace for this:
GRUB_CMDLINE_LINUX_DEFAULT="quiet intel_pstate=disable "


Terminal:
sudo update-grub


you need restart the computer
Terminal:
sudo reboot

when start yout computer again
Terminal:
 sudo cpupower frequency-set -d 1.20Ghz -u 2.20Ghz -g powersave -r
and should be change the frequency and gobernator

check changes
Terminal:
cpupower frequency-info

make permanent configuration
Terminal:
 sudo nano /etc/default/cpupower


restart you computer
Terminal:
sudo reboot

check changes
Terminal:
cpupower frequency-info

BONUS

install tool
Terminal:
sudo pacman -S msr-tools

script disable turbo-boost cpu
https://gitlab.com/cirelramos/oh-my-zsh/raw/master/turbo-boost.sh

change permisson execute
Terminal:
sudo chmod +x ~/turbo-boost.sh
execute disable
Terminal:
sudo  ~/.oh-my-zsh/turbo-boost.sh disable

execute enable
Terminal:
sudo  ~/.oh-my-zsh/turbo-boost.sh enable

check changes
Terminal:
cpupower frequency-info

Manager cpupower


Source:

https://wiki.archlinux.org/index.php/CPU_frequency_scaling_(Espa%C3%B1ol)

https://unix.stackexchange.com/questions/424602/is-it-possible-to-set-a-constant-lowest-cpu-frequency-under-the-modern-pstate

https://lenovopress.com/lp0826.pdf

https://askubuntu.com/questions/613498/automatic-switching-between-performance-and-powersave-mode-on-plugging-in-out-th


0 comentarios :

create template video

link https://www.powtoon.com/home/?

0 comentarios :

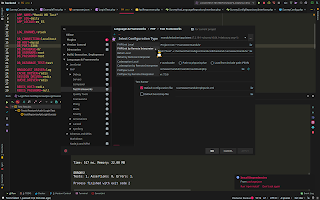
phpstorm php cli remote interpreter with docker 2019


connect to docker


configure cli interpeter


configure image


configure remote interprete


global config


or specifc network


run testunit


composer


phpunit


test result


0 comentarios :

SSH Passwordless Login Using SSH Keygen in 5 Easy Steps


Step 1: Create Authentication SSH-Kegen Keys on – (192.168.0.12)

First login into server 192.168.0.12 with user tecmint and generate a pair of public keys using following command.
Terminal:
ssh-keygen -t rsa


Step 2: Create .ssh Directory on – 192.168.0.11
Use SSH from server 192.168.0.12 to connect server 192.168.0.11 using sheena as user and create .sshdirectory under it, using following command.
Terminal:
ssh sheena@192.168.0.11 mkdir -p .ssh


Step 3: Upload Generated Public Keys to – 192.168.0.11Use SSH from server 192.168.0.12 and upload new generated public key (id_rsa.pub) on server 192.168.0.11under sheena‘s .ssh directory as a file name authorized_keys.
Terminal:
cat .ssh/id_rsa.pub | ssh sheena@192.168.0.11 'cat >> .ssh/authorized_keys'

Step 4: Set Permissions on – 192.168.0.11Due to different SSH versions on servers, we need to set permissions on .ssh directory and authorized_keys file
Terminal:
ssh sheena@192.168.0.11 "chmod 700 .ssh; chmod 640 .ssh/authorized_keys"


Step 5: Login from 192.168.0.12 to 192.168.0.11 Server without Password
Terminal:
ssh sheena@192.168.0.11


0 comentarios :

debug webpack webstorm reactjs (2019)


Package.json configuration

First of all you have to create a new Debugging script like this:

Terminal:
"debug": "node $NODE_DEBUG_OPTION node_modules/.bin/webpack-dev-server --config ./path/to/webpack.config.js"


webpack configuration

You have to add this command line:
Terminal:
devtool: 'eval-source-map'


Editor configuration

and then you have to cofigurate your IDE:

NPM


JAVASCRIPT REMOTE debug


configure browser debug


example package.json and webpack https://drive.google.com/file/d/1MRDj84Yn9iHAP-u_OeDJLshxB_82sdOV/view?usp=sharing


Source: https://stackoverflow.com/questions/38800164/intellij-idea-how-can-i-create-an-breakpoint-that-debug-webpack


https://blog.jetbrains.com/webstorm/2018/01/working-with-vue-js-in-webstorm/


0 comentarios :

android ADB WIFI


run adb devices

Terminal:
adb devices


Run adb tcpip 5555

Terminal:
adb tcpip 5555


Disconnect your device (remove the USB cable). Go to the Settings -> About phone -> Status to view the IP address of your phone.

Terminal:
adb connect <IP address of your device>:5555   


Terminal:
adb devices  


0 comentarios :